Creating Custom Sticker Labels for Your Business Branding
Unboxing a product isn’t just a moment, it’s an experience. That first glimpse of the label can stir excitement, tell a story, or instantly connect you to the brand. When done right, custom sticker labels don’t just sit on a package, they speak, they sell, and they stick in memory.
Creating custom sticker labels for your business branding is one of the smartest, most affordable ways to make your brand more recognizable. Custom sticker labels play a key role in your business’s overall branding strategy by reinforcing your brand identity at every customer touchpoint.
Whether you’re managing a small startup or scaling a bigger operation, thoughtful sticker and label design can turn ordinary packaging into a powerful branding tool.
Let’s explore how to create custom sticker labels that are more than just pretty, they work hard for your business.
Define What Your Label Needs to Do
Before you dive into colors and fonts, take a step back and ask: what’s the goal here?
Different types of stickers serve different purposes. A product label on a jar isn’t the same as a promotional giveaway sticker. Each has its own mission.
Here are a few common uses:
- Product Labels: Stickers for jars, bottles, boxes, or bags that include product names, ingredients, and branding.
- Promotional Stickers: Think fun, free logo stickers you include in packaging or hand out at events.
- Shipping & Return Labels: These can include your brand’s logo, return address, or even a short thank-you message.
- Instructional or Compliance Labels: Required for safety, ingredients, or usage guidelines, but still a chance to stay on-brand.
- Barcode labels: Print asset labels, inventory labels, shipping labels and other label needs with barcode labels.
Understanding the purpose of your label will help you determine the best label printing method for your needs.
Start by identifying where your stickers will go, what they’ll say, and what action you want your customers to take. Aligning your label’s purpose with your brand identity ensures consistency and helps customers recognize your business.
Know Your Brand Inside and Out
Your label should be an extension of your brand. The tone, look, and feel need to match what customers already see on your website, social media, or in your store. Maintaining a consistent visual identity across all label designs is essential for reinforcing your brand image.
These are key branding elements that should be reflected in every label.
Here’s what to keep consistent:
- Colors: Stick with your brand palette to keep everything cohesive.
- Fonts: Choose typography that reflects your brand’s personality, serious, playful, modern, or classic.
- Logo: Make it a focal point or background element. Either way, make sure it’s easy to spot.
Everything, from the spacing around your text to how the sticker peels off, affects how people perceive your business. Custom design isn’t just about aesthetics; it builds trust.
Pick the Right Material and Finish
Here’s where we talk about the feel of the label, and how well it holds up.
Not all labels are created equal. You’ve got a range of materials, and choosing the right one depends on what your product is and how it’s used.
- Paper Stickers: A great low-cost option for dry indoor use.
- Vinyl or BOPP Labels: Water-resistant and durable, ideal for lotions, cold drinks, or any product that needs a longer-lasting solution.
- Clear Labels: Perfect for creating a minimalist, seamless look on transparent packaging.
As for finish:
- Gloss: Shiny and vibrant, best for eye-catching designs.
- Matte: Understated and modern, perfect for boutique or organic brands.
- UV or Laminated Coatings: These protect your labels from scratches and moisture.
Think about where the label will be used. Will it face moisture? Heat? Rough handling?
Match the material to the product’s location and shipping environment. Also, consider the type of adhesive used, as it affects how well the label stays attached to different surfaces and under various conditions.
Choose Size and Shape Wisely
Your label’s shape and size can make or break the design. Too small, and you can’t fit important details. Too large, and it overwhelms your product.
Start by measuring your container or box. Then choose: Using label templates can help you visualize and select the right size and shape for your product.
- Standard shapes: Circles, rectangles, and ovals are easy to design and print.
- Custom die-cut shapes: These add flair and can help your product stand out. Think hearts, stars, leaves, or logos.
Don’t forget label placement. A sticker on the front draws attention. One on the top seals the product. Side labels are perfect for instructions or ingredients. Maintaining consistent label sizes and shapes across your product line helps reinforce branding consistency.
Design That Gets Noticed
Now for the fun part, designing your stickers. You don’t need to be a professional to make a strong impression. With the right tools and some clear goals, you can create something memorable.
Start with user-friendly tools like Canva, or go pro with Adobe Illustrator or barcode label design software from Barcodes Inc.
Refer to your branding guidelines to ensure design consistency across all your stickers. For the best results, use vector graphics to ensure your sticker designs are crisp and scalable for high-quality printing. Make sure to:
- Include key brand elements: logo, tagline, and brand colors.
- Use fonts that are readable at a small size.
- Create good contrast between text and background.
- Add extras like QR codes for special offers, how-to videos, or location-specific deals.
Decide How to Print
This is where many small business owners hit a fork in the road. Do you print in-house or use a professional service?
Here’s how they compare:
- In-House Printing: Best for frequent printing to support workflows and to maintain complete control. A thermal label printer (like the ones from Barcodes Inc.) lets you print fast and on-demand.
- Professional Printing: Great for large orders or premium finishes. Many services offer free proofs and quick turnaround times. Digital printing is a popular choice for custom sticker labels because it offers flexibility and high-quality results.
Think about:
- Order size
- Cost per label
- Quality needs
- Turnaround time
Barcodes Inc. carries a wide range of thermal printers and custom label rolls. You can get exactly what you need without overcommitting.
Nail the Application Process
You’ve designed, printed, and received your stickers. Now it’s time to apply them.
Application matters more than you might think. A crooked or wrinkled label can cheapen your product.
There are two approaches:
- Manual Application: Great for small batches. Just make sure you perform proper surface preparation, surfaces should be clean and dry for optimal label adhesion.
- Machine Application: Ideal for larger runs. Label applicators help with alignment and speed.
Use a squeegee or cloth to smooth out air bubbles. Do a few test applications before going all in.
Don’t Skip the Legal Stuff
Depending on your industry, certain label elements aren’t optional. Ensuring regulatory compliance is essential when creating custom sticker labels for certain industries, as failing to meet these standards can result in legal issues or product recalls.
Here are some things you might be required to include:
- Ingredients or materials
- Allergy information or safety warnings
- Country of origin
- Manufacturing date or expiration
- Barcode or UPC (placed clearly and scannable)
You can still meet these requirements and stay on-brand. Barcodes Inc. offers barcode label software to help you keep it professional, easy, and compliant.
Smart Places to Use Custom Labels
Stickers aren’t just for products. There are endless ways to use them in your marketing.
Some of our favorites:
- Packaging: Use labels to seal boxes, highlight product features, or give care instructions.
- Promotions: Include free stickers with every order.
- Shipping Boxes: Add your logo and return address for brand consistency.
- Retail Displays: Label signs, shelves, and sample stations.
- Swag & Gifts: Add stickers to event giveaways or small thank-you items. Custom stickers are also effective for event branding, making your giveaways stand out at conferences or trade shows.
If your customer sees it, there’s an opportunity to stick your brand on it.
Measure What’s Working
Wondering if your custom labels are actually helping your business grow? It’s easier than you think to find out.
Here are some simple tracking methods:
- Add QR codes or unique discount codes to your labels.
- Track website visits, downloads, or purchases tied to those codes.
- Ask customers where they first saw or used your product.
Tracking label performance can provide valuable insights into customer engagement with your brand.
Even simple feedback like “I loved your packaging” is a great indicator that your branding is resonating.
FAQs
What materials are best for durable custom sticker labels?
Vinyl and polypropylene (BOPP) are your best bet for long-lasting, water-resistant use. Great for products that face moisture or friction.
How do I design a custom label that reflects my brand?
Start with your logo, colors, and fonts. Use free or professional design tools to create a layout that’s easy to read and looks polished.
Can I print custom stickers using a thermal label printer?
Yes, especially for short runs or fast updates. Barcodes Inc. has thermal printers perfect for small businesses.
How can small businesses save on custom label printing?
Print in-house, order in bulk, or use free design templates. Thermal printers and label rolls also reduce long-term costs.
Should I outsource sticker label printing or do it in-house?
Do it in-house for small runs and flexibility. Outsource if you need high volume or complex finishes.
What sizes and shapes are available for custom stickers?
You can order standard shapes or get custom die-cut stickers made to match your brand.
Are custom sticker labels waterproof or weather-resistant?
Yes, just choose the right material, like laminated vinyl or BOPP, for your label’s location and usage.
Wrapping It Up
Creating custom sticker labels for your business branding is a cost-effective way to tell your story, delight customers, and boost sales. With the right approach, even small businesses can design stickers that compete with the big names.
Focus on good design, choose quality materials, and test what works. It doesn’t have to be complicated, or expensive. With tools and products from Barcodes Inc., you can get started fast, print at any scale, and keep improving as you grow.
Ready to create your custom labels? Explore printers, supplies, and software at Barcodes Inc. today.
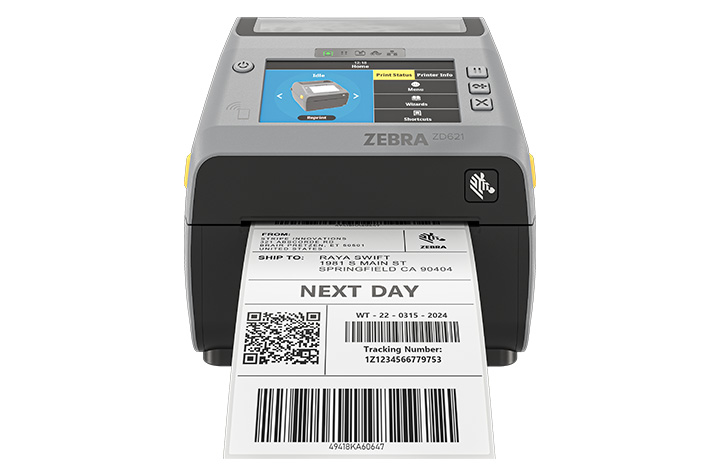
How to Set Up Your Zebra Thermal Printer for Fast and Efficient Labeling
There’s nothing more frustrating than a printer that just won’t cooperate, especially when your business depends on it. Whether you’re shipping products, managing inventory, or labeling retail items, time is money. And your Zebra thermal printer? It’s built for speed, if it’s set up right.
That’s where we come in. This guide walks you through how to set up your Zebra thermal printer for fast and efficient labeling. From unboxing to calibration and everything in between, we’ll help you skip the guesswork and get straight to printing high-quality labels. You’ll find helpful information here for setting up and optimizing your Zebra thermal printer.
Unboxing and Initial Setup: Your Zebra Printer Out of the Box
The moment your Zebra label printer arrives, it’s tempting to plug it in and start printing. But first, let’s make sure you’ve got all the right pieces.
Inside the box, you’ll typically find:
- The Zebra label printer unit
- Power cord and adapter
- USB and/or Ethernet cable (depending on the model)
- User manuals and quick-start guide
- A sample roll of labels (sometimes included)
Note: Included accessories may vary by model.
Now, let’s connect it properly. If you’re using USB, plug the cable directly into your PC or laptop. For Ethernet, connect it to your network hub or router. If your model supports Wi-Fi, we’ll handle that in the advanced section.
Power on the printer and wait for it to initialize. You should see lights or a status display that confirms it’s ready.
Installing Printer Drivers & Zebra Setup Utilities
Before anything prints, your computer needs to speak the same language as your printer. That’s where drivers and software come in.
Visit the Zebra Drivers & Support section of the Barcodes, Inc. website to download the correct drivers for your model. We recommend installing Zebra Setup Utilities, which helps configure the printer quickly. The software displays a list of all supported Zebra printer models, making it easy to select the right one for your setup.
Pro tip: Use Zebra Setup Utilities for driver installation, port selection, and printer configuration all in one place. You can get it here.
Whether you’re on Windows, macOS, or Linux, Zebra has documentation for each OS. Be sure to choose the version that matches your system and printer model.
Once installed, open Zebra Setup Utilities to test connectivity and begin configuration.
Loading Labels and Ribbons: Do It Right the First Time
This step is crucial. Improper media loading can cause misprints, alignment issues, and wasted labels.
After loading the labels, check that the label width is set correctly in your printer setup to ensure proper alignment and avoid misprints.
For Direct Thermal Printing:
No ribbon is needed. Just open the media compartment, drop in your label roll, and feed the labels under the guides and through the sensor path. Make sure the labels face up.
For Thermal Transfer Printing:
You’ll need to load both a label roll and a ribbon roll. The ribbon goes on the top spindle, and it should wrap around the printhead and onto the take-up spindle. Be sure the ribbon feeds smoothly without wrinkles.
Confused about which type you need?
Explore Zebra printer supplies to find labels and ribbons compatible with your model.
Once loaded, close the cover and allow the printer to run a few labels to check feed alignment.
Calibrating the Printer: Say Goodbye to Skipped or Misaligned Labels
Calibration ensures your printer correctly detects label gaps or marks.
With Zebra printers, you can run Zebra Smart Calibration directly from the control panel or via Zebra Setup Utilities.
To auto-calibrate:
- Hold the feed button until the status light flashes twice.
- The printer will feed a few labels and stop.
Alternatively, open Zebra Setup Utilities, click “Calibrate Media,” and follow the on-screen instructions.
If you’re seeing misprints, adjust the media sensor settings via the software to fine-tune label detection. Calibration eliminates ghost printing, jams, and wasted stock.
Configuring Label Settings: Get Crisp, Accurate Prints
Now it’s time to tell your printer what kind of labels you’re using.
Inside Zebra Setup Utilities, you’ll find options to configure:
- Label size and orientation
- Print darkness and speed
- Media type: continuous vs. gap
Important: If using ZPL label printing configuration, ensure your label format code matches your label size and type. Incorrect ZPL commands can cause skewed output.
For best results, print a test label and check:
- Are the labels centered?
- Is the print sharp?
- Are labels advancing properly?
If not, revisit your settings before moving forward.
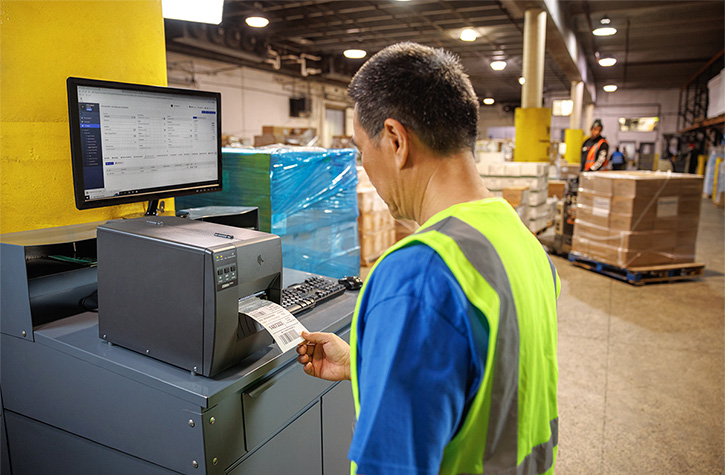
Connecting to Shipping Software or Labeling Platforms
Your Zebra printer can integrate with nearly every major platform in e-commerce, retail, and logistics.
Compatible platforms include:
- Shopify
- Amazon Seller Central
- ShipStation
- FedEx Ship Manager
- UPS WorldShip
For professional labeling, tools like BarTender or NiceLabel let you design and manage labels at scale. These programs also support Zebra printers out of the box.
In enterprise settings, you might opt for API or network printing via a Zebra print server or cloud-based system.
Once connected, perform a print test from your chosen platform to verify formatting and label output.
Troubleshooting Common Issues
Even with a perfect setup, hiccups can happen. Here’s how to fix the most common ones.
Label Jams
Check for obstructions inside the media path. Power off the printer before removing jammed labels.
Faded prints
Usually caused by low darkness settings or worn ribbon. Try increasing print darkness or replacing the ribbon.
Connectivity issues
If the printer isn’t detected, reinstall the driver and check the USB/Ethernet cable. Confirm the port is enabled in Zebra Setup Utilities. Sometimes, network security settings such as firewalls or security software can block printer connections, so check these settings to ensure access is not restricted.
Misaligned labels or ghost printing
Run another calibration or adjust label size settings. Ghost printing can also mean the printhead is dirty or worn.
If issues persist after troubleshooting, Learn how Levata Repair Services for Barcodes Inc. can help. Be sure to include any error messages or a trace id if available, as this information can help diagnose and resolve the problem more efficiently.
Maintenance Tips for Long-Term Efficiency
Routine care keeps your printer running like new. Here’s what to focus on:
- Clean the printhead every time you replace a roll of labels or ribbon. Use Zebra cleaning supplies to safely remove residue.
- Replace worn parts like the platen roller when labels start to slip or print quality degrades.
- Perform Zebra firmware updates regularly to ensure compatibility with new software and devices.
You can check for updates and install them using Zebra Setup Utilities or by visiting Zebra’s firmware page.
Advanced Setup Tips: Take It to the Next Level
Ready to go beyond the basics? These pro tips help you scale your labeling operations.
Batch printing: Configure bulk printing settings within ZebraDesigner or your shipping software. Make sure your PC’s spooler settings support large jobs. You can also use the send feature to transfer configuration files or batch templates directly to the printer, making it easier to update settings in the field.
Custom templates: Use ZebraDesigner or BarTender to create templates for recurring labels, like SKUs, barcodes, or QR codes. When managing templates, consider making configuration changes based on specific conditions, such as adjusting security or performance settings for different environments.
Wireless setup: If your printer supports it, configure Wi-Fi or Bluetooth via the control panel or Zebra Setup Utilities. For Bluetooth models, pair the device with your PC or tablet, then select it as the default printer.
For advanced integration, developers can use API access or developer tokens to authenticate, manage, and troubleshoot Zebra printer configurations. This allows for automated changes and monitoring under various conditions, streamlining complex deployments.
FAQs
How do I install Zebra Setup Utilities and drivers?
Visit Barcodes Inc Zebra Drivers & Support, download the software for your model, and follow the install wizard prompts.
What’s the best way to load media and ribbon in a Zebra printer?
Direct thermal printers require only labels. Thermal transfer models need both labels and a ribbon, load the ribbon above the printhead and ensure smooth feeding.
How do I calibrate my Zebra thermal printer for label accuracy?
Hold the feed button until the light flashes twice, or run calibration through Zebra Setup Utilities.
Why isn’t my Zebra printer showing up after I plug it in?
Check the USB or Ethernet connection, reinstall the drivers, and make sure your OS recognizes the printer in Device Manager or Print Settings.
How can I connect my Zebra printer via USB, Ethernet, or Bluetooth?
Use Zebra Setup Utilities to select your preferred connection type and follow the setup steps. Bluetooth models may require pairing through your device’s Bluetooth settings.
How often should I clean my printhead for fast, efficient labeling?
Clean the printhead every time you change labels or ribbons to maintain crisp print quality and avoid misprints.
Conclusion: Set It Up Right, Label Smarter
Setting up your Zebra thermal printer correctly makes a huge difference. You’ll print faster, waste fewer labels, and avoid the pain of mid-shift troubleshooting.
From software installs to calibration and maintenance, every step contributes to a smooth labeling experience. Remember to revisit the basics, use the right supplies, run auto-calibration regularly, and update your firmware. Need more help? Reach out to Barcodes Inc for expert guidance.
Selecting the Ideal ID Card Printer for High-Quality Badges
Creating professional-grade ID badges starts with selecting the right printer. But what distinguishes an excellent ID card printer? From print technology to connectivity, each component plays a role in producing secure, high-quality credentials. Understanding these critical features will help you identify the ideal printer for your organization. Let’s break down the key elements of an ID card printer.
Printing Technology
Direct-to-card (DTC) printers apply ink directly onto the card’s surface for quick, cost-effective printing, while retransfer printers use an overlay process to enhance durability, deliver high-resolution images, and achieve full edge-to-edge coverage.
Printing Capability
Opt for a single-sided printer for basic requirements or a dual-sided model to incorporate additional details, barcodes, or advanced security elements.
Space-Saving Design
Make the most of your workspace with a compact printer that offers efficiency without sacrificing performance.
Card Hoppers
Easily handle multiple card prints with batch-processing features—ideal for organizations with high printing demands.
Modular Enhancements
Boost functionality with add-ons like lamination for durability, magstripe or smart card encoding for secure access, dual-sided printing, or UV printing to prevent counterfeiting.
Connectivity Options
Choose the connection type that fits your workflow, whether printing from a single workstation or across a network. Standard options include USB, Ethernet, and WiFi.
User-Friendly Interface
Look for intuitive LCD screens, LED indicators, and simple controls for effortless operation.
Expert Guidance for the Right Choice
Navigating ID card printer options can be complex. Consulting with professionals in People ID and Access Control solutions ensures you receive expert advice tailored to your organization’s needs. These specialists can help you evaluate security requirements, operational efficiency, and future expansion possibilities to find the right solution.
Conclusion
Selecting the perfect ID card printer is a valuable investment. By understanding essential aspects like print technology, scalability, and connectivity, you can confidently choose a model that fits your needs and budget.
Consider both current and future requirements when evaluating features such as card hoppers, modular upgrades, and printer size. The right ID card printer will not only produce high-quality, secure credentials but also streamline your badging process for greater efficiency and security.
Browse one of the industry’s most extensive selections of ID card printers and discover the perfect fit for your organization today!
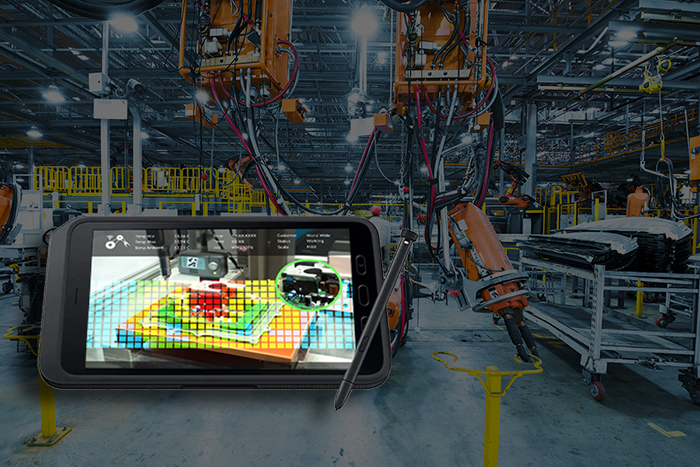
Modernizing Manufacturing: Leveraging Mobile Technology for a Smart Factory Transformation

The manufacturing industry is undergoing a digital transformation, driven by the need for increased efficiency, productivity, and quality. The transition towards modernized manufacturing is not just a trend, but a necessity for manufacturers aiming to stay competitive. At the heart of this revolution lies the adoption of advanced technologies, including rugged tablets designed to withstand the demanding conditions of the factory floor. As an industry leader in modern mobility-enabled environments, Barcodes Inc. understands the pivotal role that mobile tablets like the Samsung Galaxy Tab Active5 contribute to accelerating the smart factory transformation.
Understanding the Smart Factory Concept
A smart factory represents the pinnacle of manufacturing modernization, where advanced technologies, cloud computing, and artificial intelligence (AI) converge to create a highly connected and automated production environment. These factories ensure continuous improvement and optimization.
A recent report by CapGemini underscores the potential benefits of smart factories, noting that early adopters have already realized a 20 percent gain in production. The report also predicted significant improvements in on-time delivery, productivity, and labor rates in the coming years.
The Role of Mobile Technology in Manufacturing Modernization
Mobile technology, like rugged mobile tablets, serves as the linchpin for modernizing manufacturing operations. These devices connect staff to essential business applications, distribute intelligence and insights across the production floor, and facilitate real-time data processing. Here’s how mobile tablets like the Samsung Galaxy Tab Active5 can be leveraged to drive smart factory initiatives:
Built for the Factory Floor
The Samsung Tab Active5 is engineered to excel in the harsh environments prevalent in manufacturing facilities. Its rugged design, featuring IP68 water and dust resistance as well as MIL-STD-810H certification, ensures durability and reliability even in the toughest conditions. Whether it’s exposure to liquids, dust particles, or accidental drops, this tablet can withstand the rigors of the manufacturing floor without compromising performance.
Enhancing Productivity and Efficiency
One of the most significant advantages of the Samsung Tab Active5 is its ability to boost productivity and efficiency. By equipping frontline workers with this mobile device, manufacturers can streamline various processes, from quality control and inventory management to maintenance and repair. For example, quality control inspectors can use the Galaxy Tab Active5 to capture high-resolution images and videos of product defects, facilitating root cause analysis and corrective actions. Maintenance technicians can access digital work instructions and maintenance records, enabling them to troubleshoot issues more efficiently and minimize downtime. Additionally, the tablet’s ability to support barcode scanning and RFID technology can accelerate inventory management processes and reduce errors.
Improving Data Collection and Analysis
In today’s data-driven manufacturing environment, the ability to collect and analyze real-time data is essential for optimizing operations. The Samsung Tab Active5 excels in this area, providing manufacturers with a powerful tool for data capture and analysis. Its integrated cameras, sensors, and connectivity options allow for the collection of a wide range of data, including production metrics, equipment performance, and environmental conditions. This data can be used to identify bottlenecks, optimize workflows, and improve overall plant performance.
Enhancing Collaboration and Communication
Effective communication and collaboration are crucial for successful manufacturing operations. The Samsung Tab Active5 facilitates seamless communication between team members, regardless of their location within the facility. With features like video conferencing and instant messaging, employees can easily share information, coordinate tasks, and resolve issues in real time. By breaking down communication silos, manufacturers can improve teamwork and responsiveness, leading to increased efficiency and productivity.
The Future of Manufacturing with Mobile Technology
Utilizing rugged tablets for modern manufacturing is filled with opportunities. Manufacturers can streamline operations, boost productivity, and maintain high-quality results that lead to increased efficiency and profitability. Equally important, the integration of mobile technology like the Samsung Galaxy Tab Active5 empowers your workforce to access information and tools that create a more engaged and skilled workforce.
If you’re interested in exploring the Samsung Galaxy Tab Active5 further, or if you have any questions about modernizing your manufacturing floor, feel free to contact Barcodes Inc. Our team is here to help you find the perfect mobile computing solutions for your business.
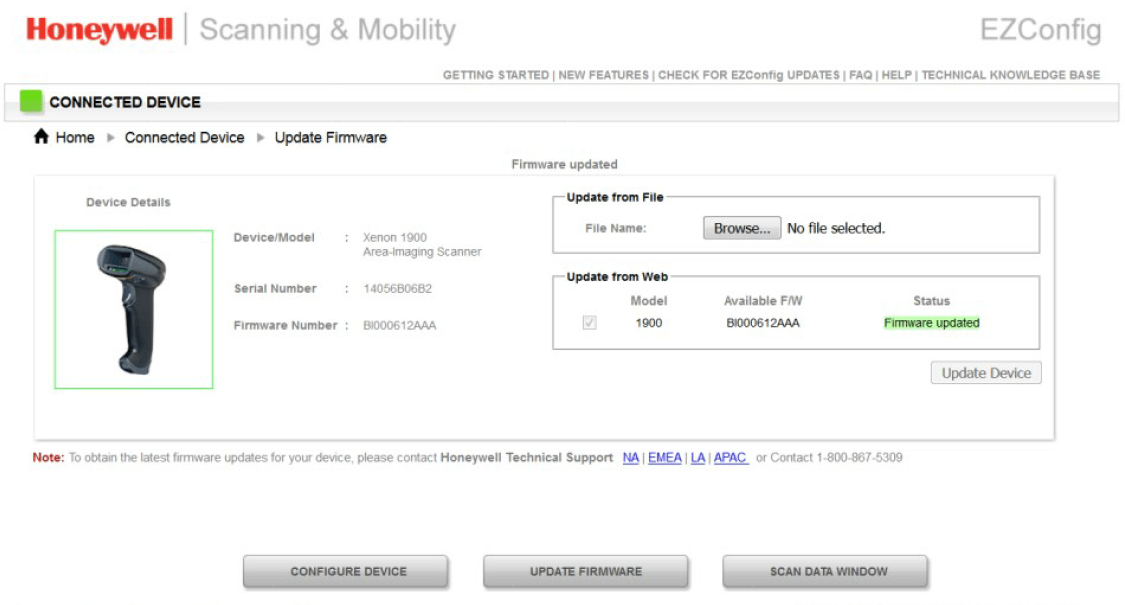
How to Update the Firmware on your Honeywell Scanner
Honeywell updates their scanners’ firmware on a regular basis. Are your Honeywell barcode scanners running the latest firmware? This ensures your scanners perform at their best. Updating firmware for Honeywell devices is simple.
How to Update Honeywell Scanner Firmware
1.) First, download the latest firmware from the Honeywell website. As an example, the Xenon 1900 firmware can be found here: Honeywell List of Software
2.) Expand the “Software†tab, Barcode Scanners, Handheld, and scroll down to “Xenon XP 1950g and 1950hc”. This takes you to that device’s specific firmware revision file with a download button:

3.) Save the .SMOC file to your hard drive so that you can grab it later. For Bluetooth scanners, you will need to update firmware for both the scanner and the charge/communication base. Always remember – update scanner firmware first!
4.) Download EZConfig (a free scanner configuration tool): Honeywell EZConfig for Scanning
5.) Connect your scanner to your computer via USB.
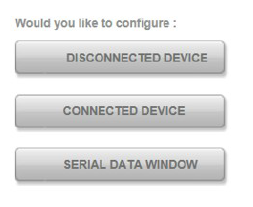
6.) Open EZConfig.
7.) Click “Connected Deviceâ€. EZConfig will find your scanner.
8.) Check to see what the latest firmware version you have on your scanner (see below). Don’t trust EZConfig if it tells you that your “Firmware is up to date.†Check the Honeywell website – it gets updated first.
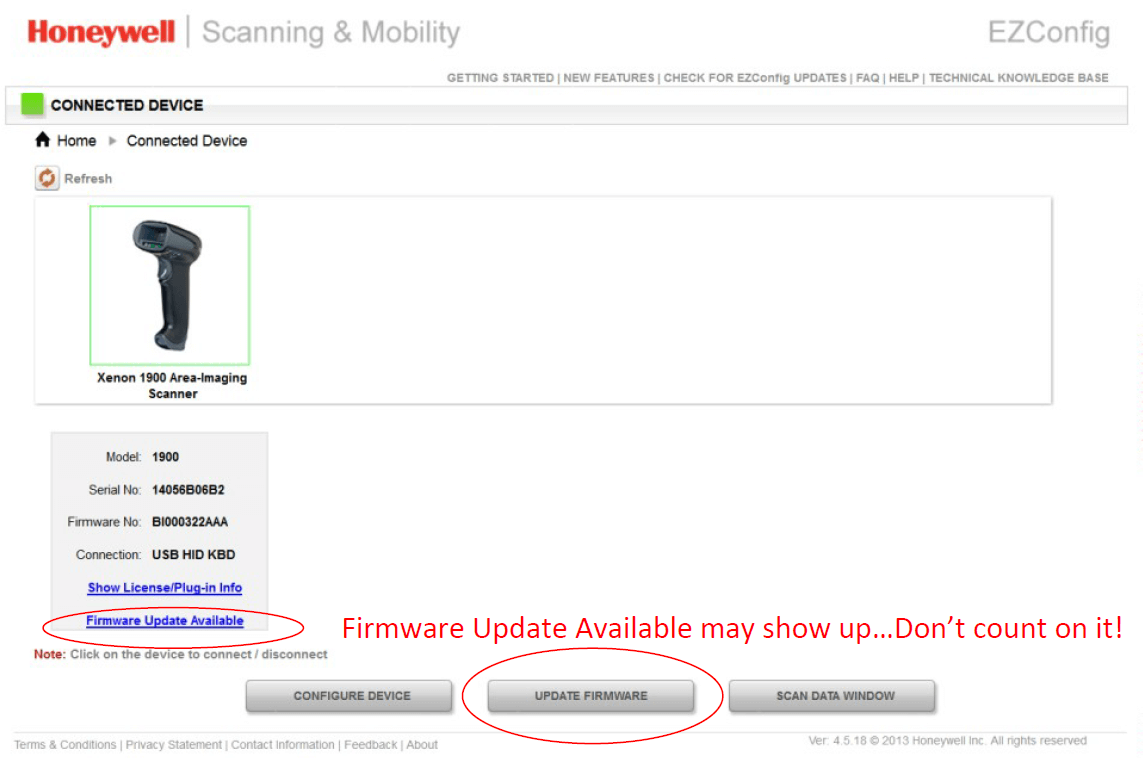
9.) Select “Update Firmware†if you need to update your firmware.
10.) Click “Browse†under Update from File. Remember, just because it says firmware updated on the status, that may not be true.
11.) Select the .SMOC file you saved earlier and upload.
12.) Click “Update Firmware†and you are done.
FOR BLUETOOTH SCANNERS – Very important!
Update the scanner’s firmware first, then the charging base firmware. Also note that the EZConfig will say that the connected device is a “Xenon Charge and Communication Baseâ€. The system knows that you are upgrading scanner firmware (when you are updating the scanner’s firmware) and will update the scanner through the charge/communications base automatically.
Honeywell EZConfig for Scanners User Guide
New to EZConfig? Download the EZConfig guide.
The UI may look a little different, but the basic instructions still ring true. If you need further assistance with your Honeywell barcode scanner firmware, contact us.
Driver’s License Barcodes Decoded

Arguably the most common of form of ID, driver’s licenses are used any time we need to confirm who we are (and more often than not, how old we are). Drivers license barcodes, along with newly updated license designs, began rolling out in May 2016 in Illinois. More on state to state variation below.
What kind of barcodes are on the back of a driver’s license?
If you take a look at the backside of your ID, you’ll find a rectangular black and white pattern known as a PDF417 barcode.
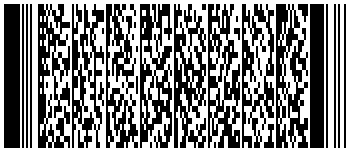
It may not look like your standard barcode, but that PDF417 code contains all the information on the front of your driver’s license or state ID in a single code.
A micro PDF417 is a type of 2D barcode that is capable of storing much more information than the standard 1D code. You may be familiar with QR Codes that you’ve scanned with your phone. Both are types of 2D codes that can be read with a 2D Imager barcode scanner.
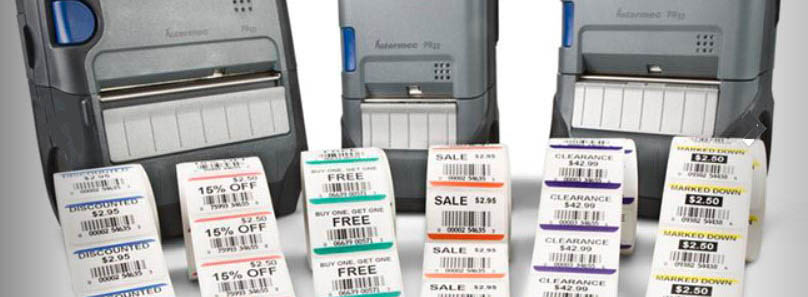
Best Barcode Scanners for Driver’s License Verification
Many businesses are using a 2D imager like the AirTrack S2 to quickly verify your age or capture basic info from your driver’s license rather than manually checking ID.
Scanners made specifically for driver’s license verification have many benefits:
- Fast capture, so you keep the line moving in the grocery or convenience store
- 100% accuracy in verification, sidestepping errors from manual ID checks at checkout
- Protection from fraudulent and fake driver’s licenses
While not every state organizes the information contained in ID barcodes the exact same way, the advantage is that criminals cannot change the information in the barcode.
This makes it extremely difficult to create a fake drivers license barcode without knowing exactly how each state encodes the data.
If the barcode isn’t created properly, it won’t read properly.
With the AirTrack S2 scanner, you can scan the code on the back of a driver’s licenses from any state to verify someone’s age quickly and accurately. This is due to the scanner’s ability to parse all the data correctly for you.
The parsing software on the scanner outputs the data you need, in the order you need it, regardless of what state you are dealing with. It’s actually faster than looking at the ID.
Another ID verification scanner we offer is the Honeywell 1400g, with models specifically designed to read PDF417 codes quickly and accurately. Corded and wireless options are available, so you can verify IDs at both the checkout counter or live event.
Avoid Fraud, Errors, and Lost Revenue
Given how simple and cost-effective 2D scanners are to get up and running, every storefront selling age restricted products should have a 2D scanner for age verification/customer info.
Related: Discount Store Case Study
With a simple scan, you avoid fraudulent ID usage and save your business from legal issues, errors, and lost revenue.
Browse our full collection of driver’s license barcode scanners and please don’t hesitate to contact us if you have questions about the best 2D imagers for your business.
How to Spot a Knockoff Rugged Tablet?

Like anything else you buy, if the price seems too good to be true, there’s an excellent chance that your instinct is right. You always get what you pay for.
True rugged computers are engineered for quality and performance first. Not only do they meet the industry benchmarks, they are the ones setting new standards. That is why you can trust these fast, powerful, and high- quality devices to do what you need them to do. (Examples: work with your software, connect in remote areas, IoT, sensors, etc)
So how to spot a knock off device?
1 )How many rugged specs are disclosed?
IP rating may provide information against dust and ware but dust and water are not the only hazards threatening the tablet’s reliability, data security, or even worker safety. A truly rugged device will be MIL-STD-810G tested for drops, vibration, shock, extreme temperature tolerance at a minimum. The best rugged manufacturers will test device behavior when exposed to high humidity levels, salt fog, fluid containment, and frequent altitude variations.
2) How specific does the manufacturer set their specific specs, and how are these capabilities certified?
It’s not enough to say that a tablet can handle extreme temperatures or it’s safe to use in Hazardous locations. Are there any certifications to certify HazLoc safety with a third-party and detail the exact operating range for every other rugged spec that applies to their device’s claimed rating?
3) What level of engineering has gone into achieving a rugged rating?
How are these devices tested? As a consumer, you may want to understand the exact technology used to make them these way. True rugged device manufacturers, supply you the information so you know how rugged your mobile device actually is. Other relating engineering questions to ask are, is the tablet still waterproof when the I/O ports are open? How are internal antennas designed, will the tablet stay connected in dodgy reception areas? At what temperature can the processor withstand to protect it before it gets too hot?
4) How long is the device expected to last?
This isn’t about the length of the warranty of the device but about the time that you can use your entire installed mobility solution and workflow. Your rugged computer should last a minimum of 3-5 years on average.
5) What is the sticker price and total cost of ownership?
True rugged tablets are designed to survive and thrive for many years. It requires lots of engineering, materials, and manufacturing process. As a result, some of the costs are front loaded. A well-made rugged tablet will dependably do the job you need it to do. The return would be it will reduce and oftentimes prevent organizational costs incurred by other less expensive device options.
As industry experts, we believe that it is hard to make a fair assumption about the device actual value based on the upfront cost. A rugged device superiority over another can only be determined once you understand the ancillary costs that will be required to implement the right workflow software for the device, deploy comparability accessories, and ultimately secure and maintain the entire mobility IT solution for the future. Check out our selection of rugged tablets and rugged laptops selection that have passed all the tests. Feel free to contact Barcodes if you have any questions, don’t sacrifice performance to save money that will help you secure approval on your next project.
Ways To Save Money on Consumables

Let’s be honest, barcode printers are not cheap. When you spend money on a printer, you also have to think about the consumables. Some printers require ribbons and all printers require labels or reciepts so how do you save on that?
Barcodes, Inc. can help:
- Join our Sign Up & Save Program– If you know the amount of labels and ribbons you need every month, find out how you can save money on purchasing consumables from us in a weekly, monthly, or quarterly cycle.
- Use the right labels with the printer – avoid printer jams and won’t need to mess up new labels
- Going on right now, save 10% on all consumables on our site with code*:Â STOCKUP
Shop Top Consumables

Contact us and find out how you can save on your consumables, we can help you find the consumables you need and give your the ROI you are looking for.
*10% OFF all printer consumables is available online only at Barcodesinc.com. This offer cannot be combined with other promotions or discounts. Offer valid on web pricing only. Offer cannot be applied to existing quotes. One time use only. Valid through 1/18/2019 at 11:59 pm CST.
How to Reduce Downtime With Honeywell Consumables
Busy Season? Trying to improve operational efficiency? Increase productivity?
Think ahead! You don’t have time to wait on a label and with Honeywell printers and labels, you won’t have to. Honeywell’s consumables are designed with reliability on quality and print speed in their selection of printers.
Their selection of genuine labels, tags, receipts, and ribbons supports a wide range of barcode printing applications from mild to harsh environments. With all these consumables offered as stock options you can quickly replenish your label material during time in need.
You can also:
- Join our Sign Up & Save Program– If you know the amount of labels and ribbons you need every month, find out how you can save money on purchasing consumables from us in a weekly, monthly, or quarterly cycle.
- Use the right labels with the printer – avoid printer jams and won’t need to mess up new labels
- Stock up during busy season-Â purchase labels in bulk to avoid downtime when you’re in need.
Contact us and find out how you can save on your consumables, we can help you find the consumables you need and get you the efficiency you are looking for!
Simple is Better with Ruckus’s Cloud Managed Wi-Fi
 Ruckus’s Cloud Managed Wi-Fi is more than just a cloud, it’s great Wi-Fi. Unlike most access points that broadcast an omni-directional signal, Ruckus maximizes signal coverage throughput and network capacity by continuously directing a signal at each client resulting in more users with more throughput per user anywhere. Further with Ruckus’s unique patented approach to channel management, Ruckus technology knows when a channel has become degraded and can switch channels after assessing the available capacity in each channel. This results in dramatic improvement and a usable network capacity, allowing devices to stay connected with more users per access point and fewer access points needed for deployment.
Cloud Wi-Fi takes the complexity out of deploying and managing a Wi-Fi network. No matter the size of your IT personnel, they’ll be able to establish, monitor and manage a high-performing multi-site WLAN of any size. The intent user interface of Cloud Wi-Fi presents network admins with only the information they need to manage the task at hand. This allows any member of the team, even with minimal experience, to manage the wireless LAN efficiently.
![]()
Key Benefits
- Managed Simplicity: Simplify WLAN administrative tasks, from day-to-day management to setting up new venues and creating guest networks.
- Visibility and Control: Manage your Wi-Fi network from anywhere using the web interface or mobile app with the ability to view real-time and historical data on applications, clients, traffic and more.
- Better Performance at a Lower Cost of Ownership: Users get a superior Wi-Fi experience while saving money. Ruckus’s access points, support more users per access point. A greater capacity and coverage means you save on your Wi-Fi infrastructure as you grow.
Want to try Ruckus Cloud Wi-Fi? See first hand how Cloud Wi-Fi simplifies WLAN management. Completely free, no obligation and no credit card required. To learn more and try Ruckus Cloud Wi-Fi for 60 days request one of our dedicated Account Managers Here and they will be able to sign you up for your free 60-day trial. Get your free 60-day trial of Ruckus Cloud Wi-Fi today!