
TrueView
TrueView - How To Create Custom Views


Notifications


TrueView: How to Create Custom Views
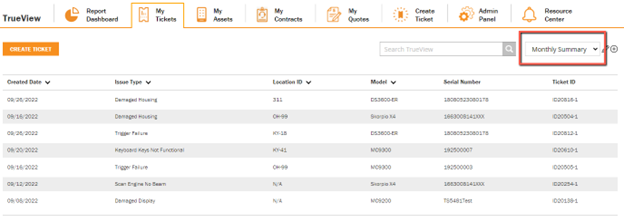
The custom view can be created in My Tickets and My Assets section of TrueView.
To add a new custom view click the + sign to the right of the Default View drop down.
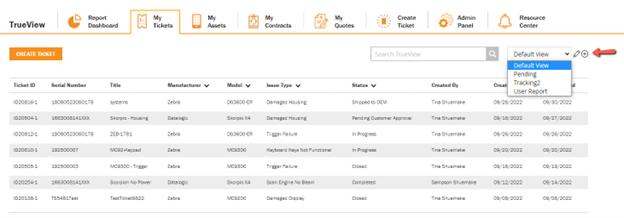
This screen provides you the ability to create custom views for summary screens and reporting capabilities
Once a custom view has been created it will be listed in the drop-down menu as well as the Report Dashboard if desired. These custom views can be exported to a CSV file or set up as a report that can be generated and emailed automatically based on user defined period.
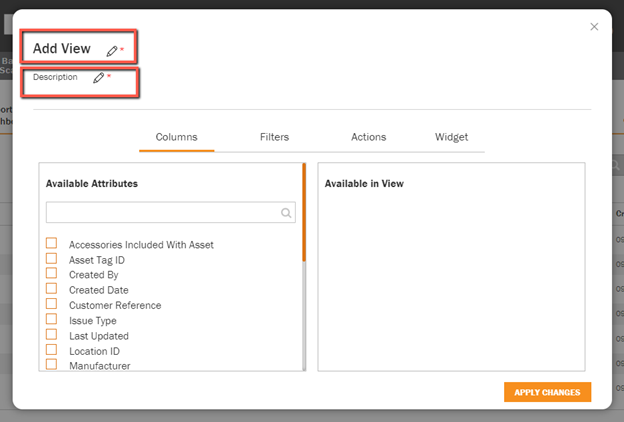
A new view requires a title and description.
To add title, select the pencil to the right of Add View and Description to enter desired information. You will then be ready to create a Custom View.
Select Columns tab to choose attributes for created View
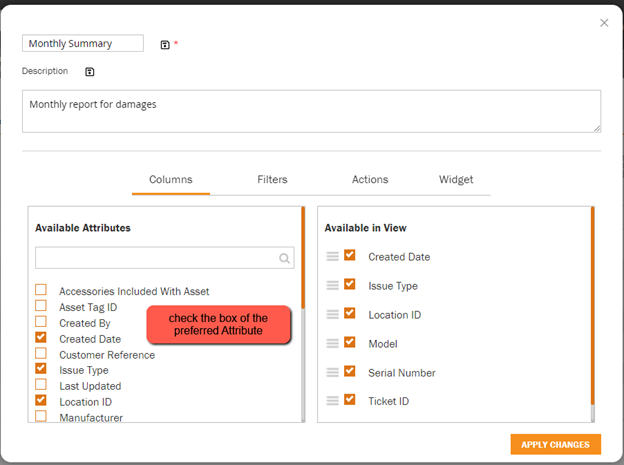
- Choose desired attributes to display in created view from the drop down list by clicking on the box next to the attribute.
- Selected attributes will appear in the box on the right. You can change the order in which they appear by clicking and dragging up or down.
To apply filters to selected attributes click the Filters tab

- The selected attributes chosen in columns will appear in the left side box and the applicable ticket issue types will appear in right side box.
- You can choose from the list to narrow down the view to only specific options listed
- Click on any of the attributes displayed to bring up corresponding information
To establish a schedule for generating and sending a report of the view click the Actions tab
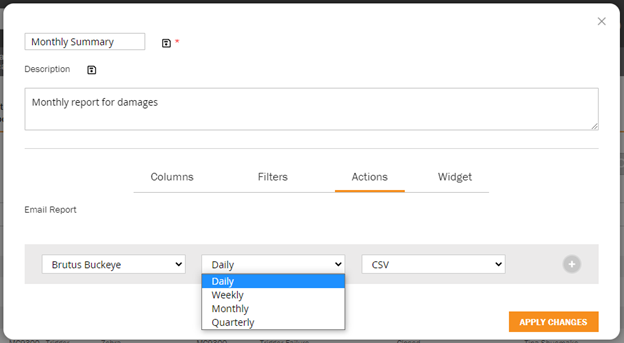
- Emailed copies of views will be sent to the contact selected on frequency and file type selected
- Contact must have a log in to TrueView
To apply the custom view as a Widget on the Report Dashboard click on the Widget tab
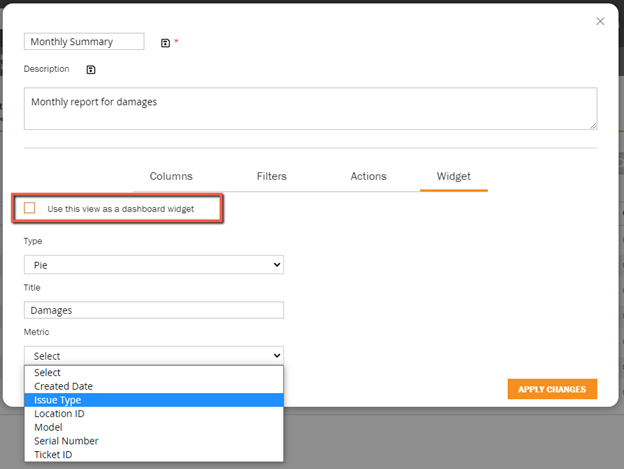
- Check the box for dashboard widget
- Select display type in drop down
- Title – What you will relate it to
- Metric for what you want to see measured on the dashboard
Once you have selected all of the options press APPLY CHANGES radio button to save. A message will be displayed View Updated Successfully and you will be returned to the summary page. You will now see your view listed in the drop down.
To have the Custom Widget display to the Report Dashboard
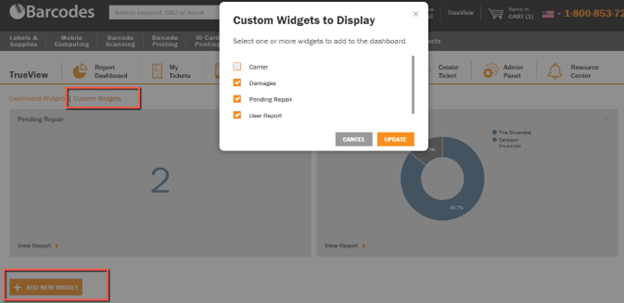
- Click on Report Dashboard
- Click Custom Widgets
- Click the + ADD NEW WIDGET radio button
- Pop up box will display all of the Custom Widgets that are available
- Click Update, a message will display Record updated successfully and the page will refresh and the widget will appear