TrueView
TrueView - How to Create My Locations


Notifications


TrueView: How to Create My Locations
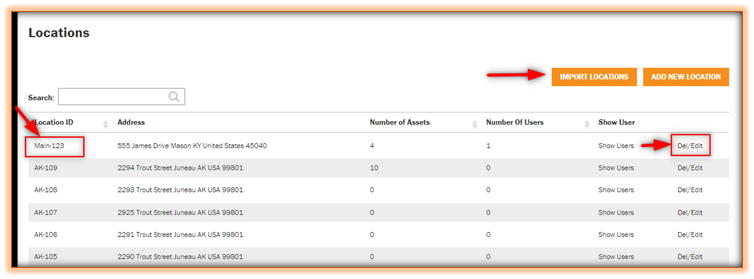
Creating a Location ID
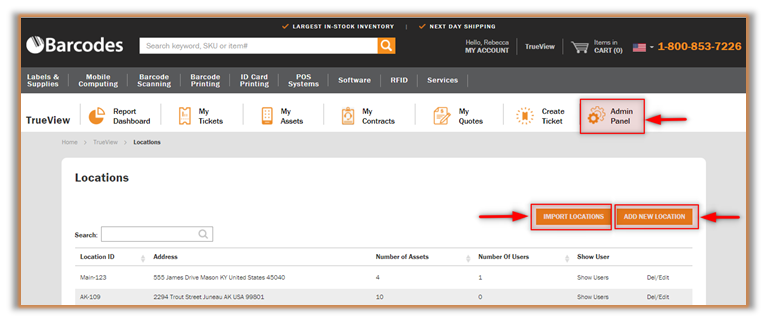
If you have permissions to Location ID's the Admin Panel will display.
Creating a Location ID allows users to assign assets to locations for reporting and tracking purposes.
Once a Location ID has been created, the user will be able to assign a location for an Asset that will display in My Assets, My Tickets, and the Create Ticket form.
You can add locations in bulk by clicking on Import Locations button or individually using the Add New Location button.
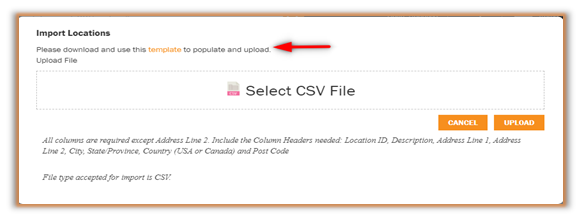
Bulk Import Utility
A pop up window will provide you with template to use for compiling data. Once completed, use the Select CSV File option and Upload to bulk add new locations or bulk edit existing locations.
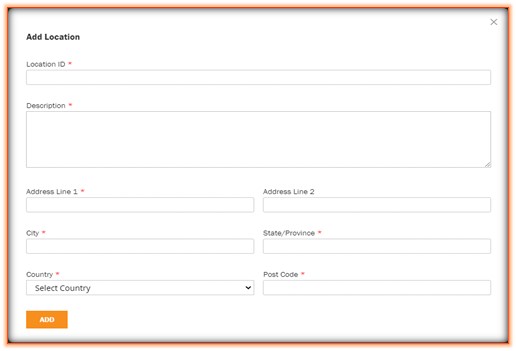
Add Asset Individually
Click the Add New Location radio button. All fields are user defined and fields with red asterisk are required.
Once a Location ID has been created, it will be in the Locations summary page. You can edit or delete a location as well as add new location or use the bulk import utility,
Location IDs Detail Page
A map of the Locations will appear, including the description and address. You can make changes using the edit radio button.
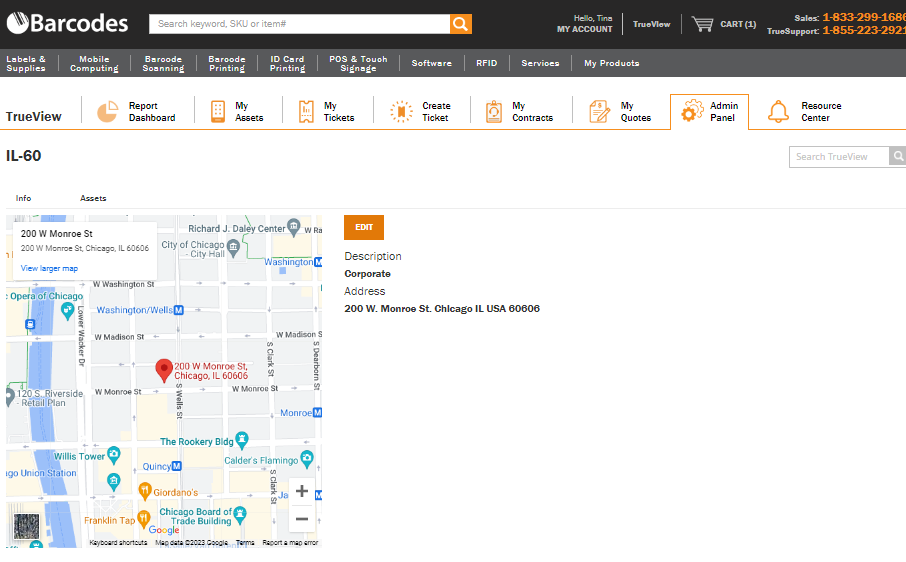
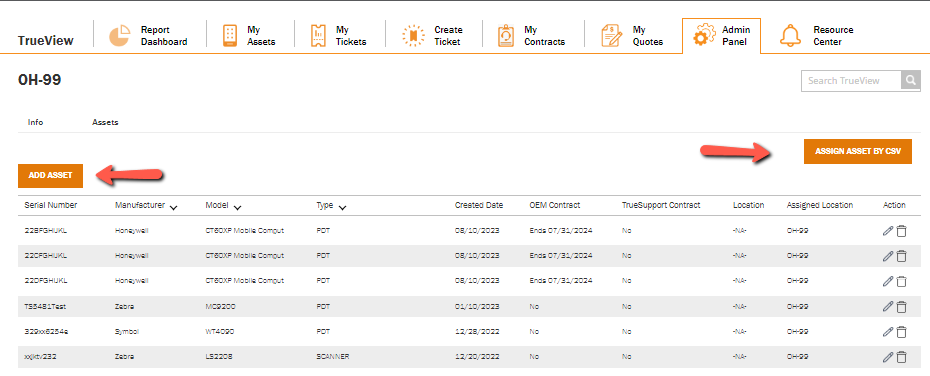
You can assign assets to Location to improve reporting and expedite creating tickets. Use the Pencil to change Location ID.